Even Picasso needs the right tools to create art!
Do you have the right tools to set yourself up for success in digital marketing? It doesn’t matter if you are the best digital marketer in the world or a completely new digital marketer, your tools are what makes or breaks your success. When you aren’t using the right tools, you’re only holding back your potential growth.

With that being said, I’ve seen many tools online that promise to increase my efficiency, but not all tools are built the same. Whenever I do see a great tool, I would love to tell everyone about it.
It is even better when these tools are free. Some of these Chrome extensions do have paid versions with extra features, but the free version does a great job. Don’t spend extra money when you can get the same results for free.

Today is the day where I will share 7 of my favorite extensions that I personally use. This is a list of extensions that you can add to your own Chrome Web Browser to save yourself some time, increase productivity, and help you make better marketing decisions.
Getting started: Setting up/deleting extensions
Extensions are tools to increase the functionality of your browser. It makes your web browsing experience better. Even setting up your extensions is easy.
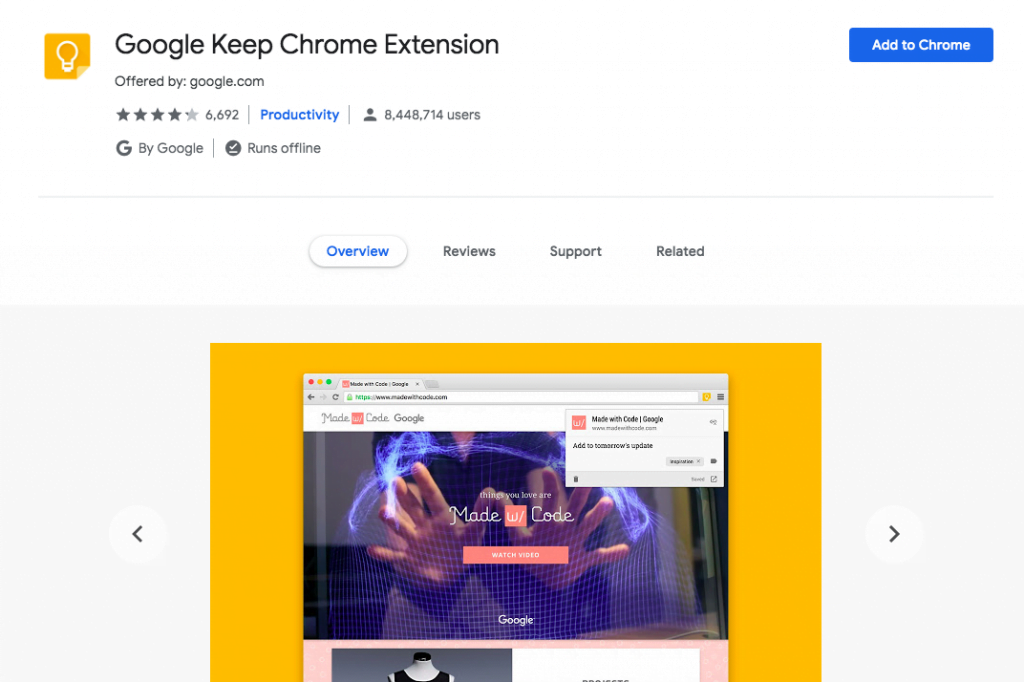
Here’s how to start. Go to Chrome Web Store and find the extension you’re looking to add. Once you’ve found it, simply click “ADD TO CHROME” on the top of the page.
To remove an extension that didn’t turn out as useful or fun as you originally thought, just left-click on the extension at the top of your browser and select “Remove from Chrome”.
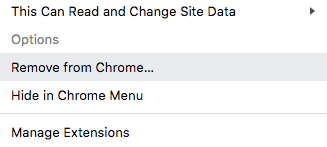
Poof! It’s gone.
Now let’s get to my list of useful extensions.
1. Grammarly
Grammarly is the perfect tool to improve your writing and check for any necessary grammatical edits. Grammarly will automatically notify you if there is a misspelling, grammar mistakes, and other common writing errors.
Grammarly’s normal platform requires you to copy and paste your writing into their editor, but as an extension, edits and suggestions will appear instantly within the page you’re currently on.
You can edit on Grammarly’s website by clicking on the extension at the top of the browser. It’s a green circle. You can’t miss it. Then look at the bottom of the popup and click “My Grammarly”.
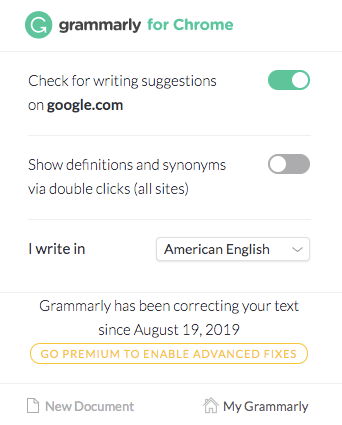
Then you can proceed to either upload a document or type directly into Grammarly’s website. I personally don’t think you will use this feature because Grammarly’s automatic notification portion of the extension is far more superior and convenient.
As a Chrome extension, it will appear on your screen like this.
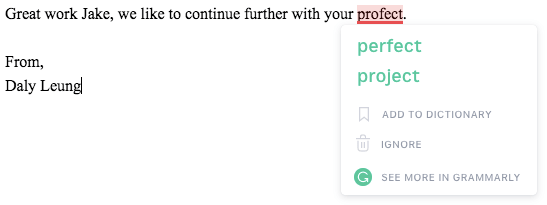
You can choose from the suggested words, add to the dictionary, ignore the recommendation, or see more in Grammarly.
Grammarly is compatible with almost every website. You can use it to proofread your emails or even Slack messages, but I mainly use it for Google Docs and ad copywriting.
Through personal use, I found that Grammarly is a far superior program than Google Docs’ basic grammar corrector.
If your Google Doc document is too long, updates might not appear automatically, so you would need to click the green Grammarly icon on the bottom right. This will start Grammarly’s programming and you’ll receive live grammar suggestions. But this doesn’t happen too often. It typically only occurs if you have 10 or more pages.
When using Grammarly on Google Doc, it will have “beta” covering the Chrome extension. Don’t worry, there’s no difference and it works just as great.
I personally use Grammarly to proofread my ad copies, but they can help you with your ad copies, client-facing emails, contracts, and even documentation. Proper spelling and grammar are vital in looking professional. People are reading your contracts and emails. I won’t trust them to do business for me if they can’t even remember to proofread for grammatical errors.
That also goes for ad copy. Your customers read your ad copies. You don’t want a simple grammar error to cause them to think negatively about your business. It’s tough enough to generate a conversion, but imagine losing a customer because you spelled something wrong. That’s just silly.
2. LastPass
In this age, you have a countless amount of passwords for your many social media, online shopping, and marketing tool accounts. You can’t possibly remember all of them unless you’re using the same password for every account — which, needless to say, is extremely unsafe.
LastPass acts as a vault to keep your account information safe and ready whenever you need to use it. Think of it as a virtual notebook that stores all of your passwords, securely.
After you have downloaded LastPass, click on its icon on the top right corner. Then you would be asked to create your account using any of your emails.
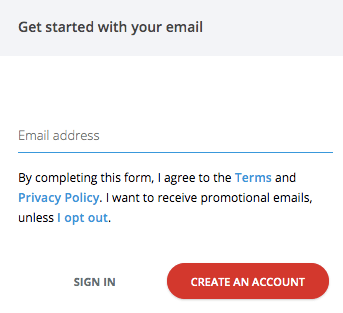
Follow the simple instructions of creating your password and boom you have full access to LastPass.
The main feature of LastPass is its vault. You can keep anything in there secure, but you’ll mainly add account information and passwords. When you go onto a website that requires your login information, as long as you have already added that information into your vault, LastPass will automatically fill in the information for you. This makes your next login easier.
How convenient! You don’t need to struggle with recovery questions or click “forgot your password” ever again or scramble through your notes looking for that elusive password. This is definitely a time saver.
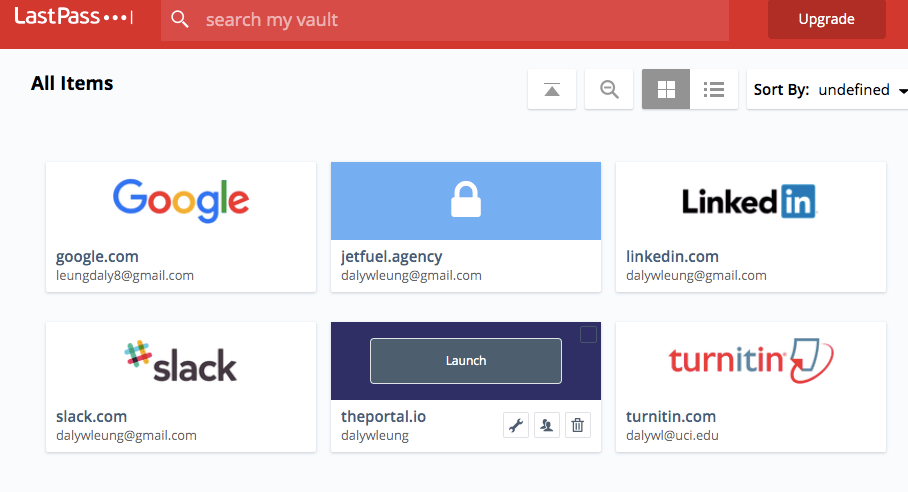
Along with account information, you can securely store notes and add personal information to save time filling out forms.
You can even add payment information to save time at checkout. You can even add bank account information to make paying bills online faster.
Click the “+” on the bottom right corner and you can add as many account information as you want.
If you want to add a new password click on “Password” and follow the instructions.
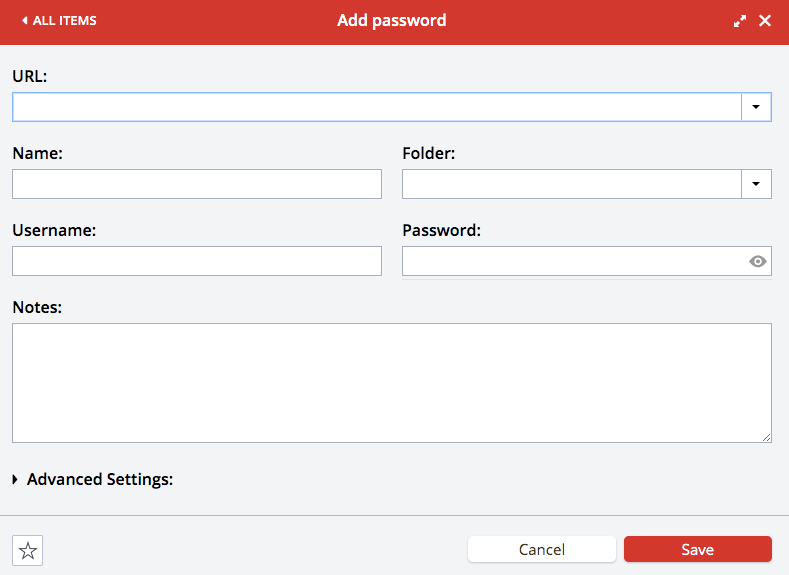
The instructions are easy to understand. You won’t have any problems with LastPass.
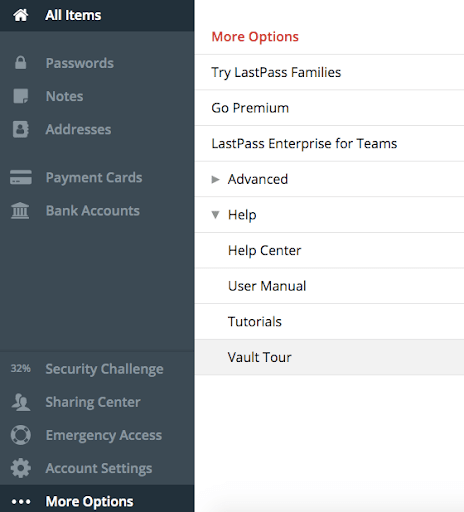
But if you do need a refresher, you can go to the left side menu and click “More Options”, “Help”, and “Tutorials” or “Vault Tour”.
Another feature that makes LastPass special is its share function. You can share your passwords with team members without revealing the actual password, and also revoke access at your discretion.
This makes sharing your Netflix account even easier.
But as a marketer, LastPass is great in sharing Adwords and Facebook accounts securely. Super secure passwords are over 15 characters long. I definitely won’t remember multiple unique passwords that are this long and I guess you can’t either.
When collaborating on projects, marketers can share account information with each other. Multiple people can access and work on campaigns together.
Account managers can even grant access to new marketing interns so that the interns can perform some simple maintenance. You can grant your interns access to your Adwords account, so they can add negative keywords, write new ad copies, and add new ad extensions for you.
The bottom line is that LastPass makes account sharing easy. Very easy. I’m not constantly bombarded by my colleagues with “What’s the password again?” because they have my account info saved in LastPass’s vault.
3. Check My Links
A broken link will definitely ruin the user experience of any web visitor. Check My Link Chrome extension helps to highlight all of the broken links on a web page.
To use this extension, go on any website and click on the extension on the top of your browser. Clicking on it will activate Check My Links programming.
With the extension, green indicates that a link is working perfectly, but red would indicate that there is an error. The red is what you need to change. They are highly visible and color-coordinated. You can’t miss them.

This Chrome extension is simple but you can use it in 2 main ways.
One is that you can improve your SEO ranking by fixing broken links and increasing your user experience. Broken links create user frustration, give off the impression that you don’t care to maintain your website, and possibly affect your website conversions. Google loves when users have a great user experience on your website. That’s how they judge whether or not they should increase your search ranking. Broken links will definitely make our overlord, Google, unhappy. This will push back your website ranking a couple of pages.
The second benefit is that Check My Links allows you to hunt for new backlink opportunities. Most of the time, the web page owner does not know that their link is broken. When you notify them and give them an alternative to fill the void, they will most likely accept. Boom! You just got yourself a brand new backlink. Wow, that was easy!
4. LinkClump
Digital marketers constantly do research on a multitude of topics daily.
As such, you’ve probably opened an innumerable amount of tabs on your web browser. You would need to constantly scroll through the page and click on the multiple links.
LinkClump allows you to open many links with a few clicks. With the extension installed, you would only need to hold down z, then click and drag.
Yes, you heard it right. Just hold down z, then click and drag.
Boom! All of the links are now opened in new tabs within the same window. Unlike most of the extensions on this list, you don’t need to click on the actual extension at the top corner for it to work. Just use the command.
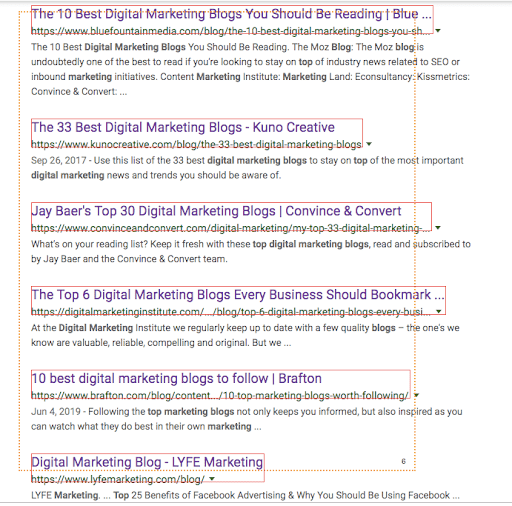
This tool might seem simple, but it will save you a lot of time from going up and down Google clicking on the links. Any time saved from doing mundane tasks can be better spent on strategizing.
I mainly use this extension for my content research and creating blog content. When researching, I can open multiple links quickly without scrolling down and clicking “Open Link in New Tab” link by link. Then I can individually go through these articles and see which one is helpful.
5. Hunter
Hunter is a Chrome extension that allows the user to find all available emails for any website. Just like the previous extensions, this one is straightforward and simple. Go onto any website that you want to find their contact info and click the fox icon on the top right. The extension will spit out any possible email addresses and even phone numbers if available.
Hunter does a great job of identifying the person’s full name if possible and their job title.
The extension helps to identify filter the contacts based on categories at the top. Once you click on the category, it will exclude the other contacts.

So why would this be helpful?
Any SEO expert would love to be able to find a person’s contact information with a click of a button. With their email addresses, marketers are able to outreach and create potential backlinking or guest blogging opportunities.
This extension forms a great combo with Check My Link, which is our third Chrome extension on the list. As you have learned from Check My Link section, you can get a backlink by correcting a broken link. Once you’ve found a broken link, you can use Hunter to find who’s the right person you should contact and the extension will provide the person’s contact information.
You don’t have to ever struggle with finding a person’s contact information again. Let’s make fixing broken links a tad bit easier for you.
After you got their contact info, shoot them an email and in most cases, the person will say yes. Now you’ve got yourself a backlink.
6. Keywords Everywhere
Keywords Everywhere provides you with important metrics like search volume, average CPC, and an estimation of how many advertisers are running ads on Google for a particular keyword.
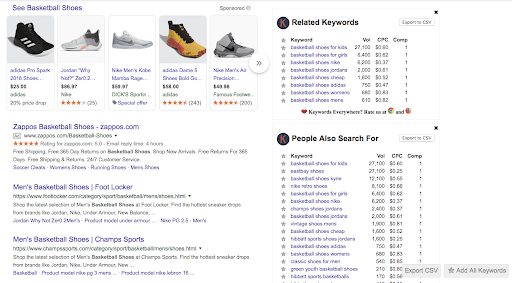
Every time you search a term on Google, a list, created by Keywords Everywhere, will appear on the side of Google’s search engine, which is shown in the picture as the two lists on the right side.
The list labeled “Related Keywords” is a list of keywords that are similar to your search term. The “People Also Search For” list is exactly what it sounds like. It’s a list of keywords that people search for when they type in their search terms.
The lists are broken into 4 categories which are “keyword”, “search volume” (average of the total monthly searches), “cost per click” (the amount you pay for a single click for the keyword in Adwords), and “Adwords competition” (gauge of the number of people running ads on Google for the particular keyword).
This data is compiled from 16 websites such as Google Analytics, Google Keyword Planner, YouTube, and Amazon. Now that’s a lot of data from many sources. Keywords Everywhere makes keyword research easier and less time-consuming.
You can also export the data as Excel, CVS, or PDF format.
You can also individually like each term by clicking the star on the left side of the keyword or you can add all of the keywords by clicking the button labeled “add all keywords”. Once you have added these keywords, you can access the list that you have created by clicking on the extension at the top right and then click “My Keywords”.
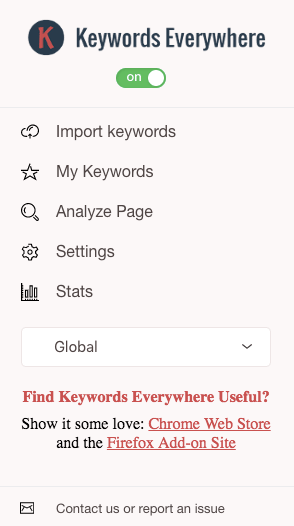
Once you access your favorite keyword list, you can delete selected, unselected, or all keywords through the red buttons at the bottom of the page. Then you can export it into Excel, CSV, or PDF format. After exporting you can upload it into Adwords.
Any great Adwords marketer will definitely find this extension helpful. Adwords is all about the keywords.
And guess what this extension specializes in?
If you haven’t guessed it yet, it’s keywords. Keywords Everywhere and Adwords is a match made in heaven. I use keywords everywhere to give me keyword inspiration. It also suggests keywords that I may not have thought about using. I would like to say “more keywords suggestion the better” am I right? It’s even better when the data is right there in front of me which lets me analyze and pick out the perfect keywords for my campaign.
7. Page Analytics
This extension created by Google shows how customers interacted with your website for a given time period. Page Analytics provides you with unique page views, average time on the page, bounce rate, and percentage of people that exited. It will also show how many clicks for each link on your website.

In order to properly use this extension, you would need to have a Google Analytics account.
Once you have everything set up, click on Page Analytics extension and the real-time data will appear.
As you scroll down to the actual page, onsite links will also indicate the percentage of clicks that a particular link received. Page Analytics will provide you with the exact number of clicks it received.
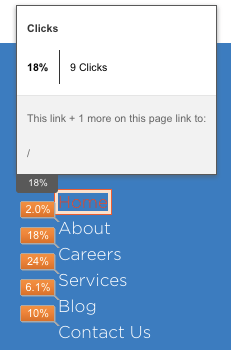
You can use this information to change your website layout and test what works when you’re trying to create a user-friendly website experience. It’s all about trial and error. Your website might not be perfectly optimized on your first try. The data can help improve your user experience, optimize website layout, and ultimately increase conversions. Page Analytics provides you with the data you need to see if your changes are going in the right direction. All of the data is organized neatly right in front of you.
If the Page Analytics bar is obstructing your view or you’re simply done using it, you can click on the Page Analytics extension to switch it off. The click percentage will still appear next to the links, but the data bar won’t be.
One of the common issues I have personally experienced is that the extension doesn’t activate because there are too many Google accounts signed on at the moment.
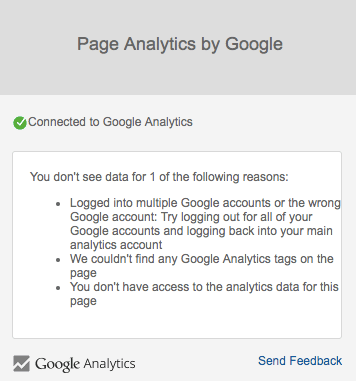
You can solve this issue by signing off of these accounts and only log into the one that is connected to Google Analytics. Then you can refresh the page. Page Analytics should activate once you click on the extension again.
Conclusion
These Chrome extensions definitely made my digital marketing day to day a whole lot easier. Tools are meant to save you time and increase efficiency.

There are many more Chrome extensions for you to explore, but here are my 7 favorite free Chrome extensions. Check them out and I hope you like them as much as I do.
Feel free to comment below with your favorite Chrome extension.
